Showing posts with label Semi-Tutorial. Show all posts

Thursday, May 16, 2013

Finally, a Semi-Crafty Post!

Just a little glimpse of some clothing projects I did while waiting for the Peanut to arrive...


I dyed some onesies (some I bought, some I received at a shower) red and blue. Then I created the designs using both PhotoShop and a word document and printed them out on normal printer paper. After tracing them onto freezer paper (placing the printed page underneath and tracing with a permanent marker), I cut out the freezer paper designs with a regular scissors and an exacto-knife. Then, following a tutorial from Dana, I ironed the freezer paper onto the onesies and painted them white!

You can see the fermata on the red onesie and the math joke on the blue one. I also have a few more - another math joke, plus a mountain climbing on for Grizz, and a Montana one to honor the state she was born in. The "Cutie Pi" was made with only paint, but the others are a combination of painted designs with iron-on letters for the words. When I do this project again, I will do my best to only use paint - the letters look like they're starting to fall off from stretching the onesies so much while getting them over Peanut's head.

The bottom onesie is one that was created at a baby shower. The hostess had a lot of onesies, burp rags and bibs to be decorated with paint and stencils. I made the cow one :) I decided to switch it up and paint the outline instead of just the inside of the cow. It was such a fun project at the shower!

**The "Acute Baby" onesie was worn to the shower thrown by a few math teachers I subbed for often :)

Friday, May 11, 2012

Happy Birthday, Nephew!

It is one of my nephew's birthday today! He turns 2!

He likes to wear hats. A lot. A few months ago, I saw a picture of him wearing on of his dad's scrub caps. That's when I decided he needed one of his own! 
(The pants are from Made by Rae's pattern Big Butt Baby Pants using the 2T size)

I have a pattern for adult scrup caps, as I made his dad one for Christmas (little boy's cap is from the leftover fabric!). So, I asked my sister-in-law to measure little boy's head. I just kind of winged it after that... I tried to follow the pattern for the crown but I didn't trust myself cutting out the top of the hat, so I just pinned the crown to a square of fabric and hoped for the best as I sewed around it :)

 Here's the finished product! I am crossing my fingers that it somewhat fits the little boy's head, but I'm not trying to get my hopes up...


Here's the back... if you read all the way to the bottom of the post, I'll show you how I finish off ties made from bias tape :)

 While making the cap, I was very, very worried that the finished product wasn't going to look at all like a scrub cap, but I didn't like envisioning my little nephew in a do-rag... so I used the stitches on my machine to put the little doctor's name on it... no mistaking this scrub cap as a do-rag, right?!

 One last picture. Yay for being able to sew for little ones :)


Semi-Tutorial ~ Finishing off Bias Tape Ties/Straps

As promised, here's how I finish off bias tape ties. I figured this out while I was sewing all those pillowcase dresses for Hopeful Threads' April project...

 I open the end of the bias tape up...
 ...fold it under a bit...
 ... then I fold in one side of the bias tape...
 ... and then the other (it's kind of like folding up a paper airplane!).
 Then, you just fold it onto itself. Pin it.
Sew it! Don't forget to backstitch!

For the scrub cap, I started on one end of a tie, sewed toward the cap, sewed the bias tape onto the cap, and then finished at the other end of a tie... all one continuous stitch. It's the same for attaching the straps to a pillowcase dress!


Wednesday, April 25, 2012

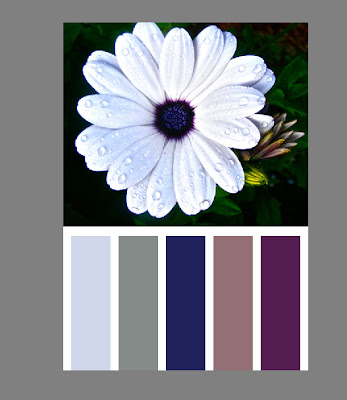
Photoshop Tutorial: DIY Color Cards

Let me start with this... I am not a Photoshop wizard. I took one class in college on photography and we dabbled in Photoshop. Last year, I was able to play a bit more in Photoshop on the Macbook provided by the school I taught at. This past summer, Grizz and I bought our own Mac, and we splurged by buying Photoshop, too.

I love pictures - I love taking them, I love editing them and I love adding words and lyrics to them. And if I've learned anything by my Photoshop dabbling, it's that you need to do some trial and error to get what you want. Just keep pushing buttons to get the affect you want, don't be afraid of the "Undo" button, and learn as you go.

With all that said (thanks for sticking with me), I am going to try to show/tell/blab about how I made these Color Cards :) Here we go!

*Note: you can click on the photos to make them bigger if they are hard to see!
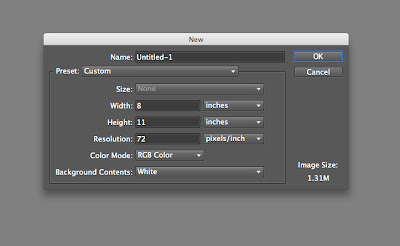
File > New > Blank File
Start with a new file [File > New > Blank File] I start with an 8" x 11" white background at 72 pixels/inch (this should be around 600 x 800 pixels which is what I like my blog pictures to be at).

These tools will be used a lot in this post.

Then, I search through my "artistic" photos and drag one into Photoshop - it should come up as its own file (if you are unfamiliar with dragging photos into Photoshop, you can also open a new file through Photoshop. [File > Open]) Once your photo is open, using the Rectangular Marquee tool, click and drag around the area that you want to use for your Color Card. Copy this. [Edit > Copy]
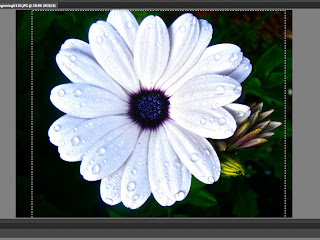
Rectangular Marquee to copy from the original picture
Head back to your "new file" and paste [Edit > Paste]. You may need to drag the corners to make it smaller so it fits on your background. No worries :) Also, if you chose a horizontal picture, you will have to rotate your background before pasting the picture. [Edit > Rotate]
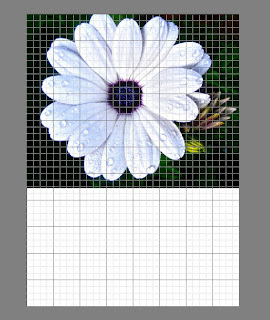
The grid!

About this time, I like to put the grid up [View > Grid]. This will help line everything up nicely and makes you sure that everything is centered.

Ok. Let's get some colors on there!
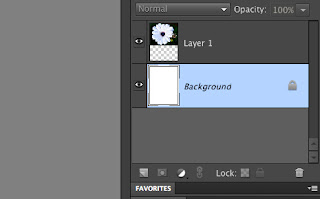
This is on the right-hand side of your screen.
It shows what layer you want to use/edit.
Make sure your background layer is highlighted. Using the marquee tool again, click and drag a rectangular shape below or beside your picture (depending on if you have a horizontal or vertical color card). Try to eye the size of it so you can fit 5 of these rectangles in the blank space of your color card. (You can always adjust them later, or crop your background layer if things aren't lining up - use that grid!).
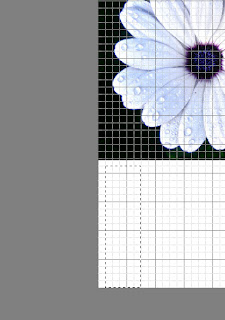
Rectangular Marquee Tool
With the rectangle still showing - go up and [Edit > Copy], [Edit > Paste]. You just made a new layer for one color! Go ahead and "Paint" it whatever color for right now so it doesn't blend into the background.
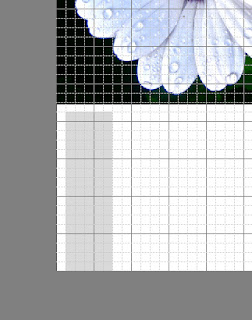
After painting the copy/pasted rectangle
Rectangular Marquee around your new colorful rectangle and Copy/paste this again... paste it 4 times, so there are 5 rectangles. Slide them around and try to center them on your color card. Sometimes, when starting with a new file for these, I end up cropping the background to help the rectangles fit just right. [Image > Crop]. Once you have made one of these cards, however, you never have to mess with this part again - you can just change the picture and colors and then save as a new file!
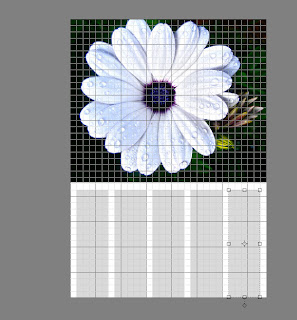
5 rectangles, all centered!
Now for the fun part!!!

After painting the rectangles
Using the eye-drop tool, pick out a color from your picture that you want highlighted on your color card. Click your picture with the tool and then paint one of your rectangles, always making sure that the rectangle you want to paint is highlighted. You can rearrange these later if you want the colors in a different order.
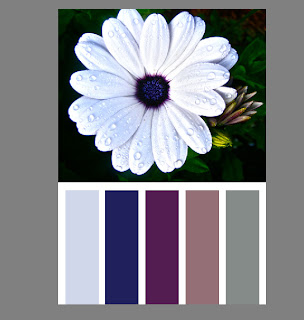

After rearranging the rectangles
You can be done here if you'd like... but I like to add a title with a text box and I put a little label/copyright on as well. If you have questions about how to do either of those, feel free to comment or email me!

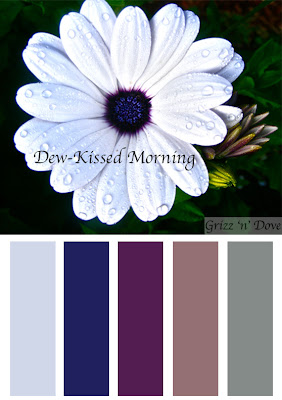
Final Product :)
I same my color cards twice - I first save it as a Photoshop file (.psd is the extension). When it is a .psd you can still edit it in Photoshop if you realize you want to change the colors or perhaps you spelled a word wrong... I save it again as a JPEG (.jpg). This is what I upload to the blog. Once you save it as a .jpg you can no longer edit it in Photoshop!

Like I said earlier, when learning a new software (or trying something new on an old software), you cannot be afraid to mess up... the little "Undo" button is there for a reason! It's like the seam-ripper to a quilter :)

Again, if you are unclear about a step, or you get stuck while trying this yourself, feel free to contact me! Good luck and have fun!

Monday, March 5, 2012

Embroidered Napkin Decor

Slowly, slowly, I'm starting to get the 2nd bedroom back under control: it's the location of a random assortment of *stuff* --> everything from my sewing machine to Grizz's hunting bow. You've seen the Hanging Hoop Hopper here, and I've had the embroidered napkins for a few weeks (thank you thrift store!)

 Last night, as I was walking around the apartment, in and out of rooms but not doing much of anything, I had an ephiphany. I've seen lots of hanging hoop artwork around the internet (primarily Pinterest), and I knew I had the napkins mixed in my stash of vintage linens.

 Miraclously, the hoop I had on hand actually fit the napkin - I just plopped it in and hung it up on a push-pin. Instant decor!

But, then I decided that I needed to clean it up... so today I did this:

 I started with the "Mr" napkin... rather wrinkly, eh?

 I grabbed a heavier cotton from my stash and I ironed both items...

 Instead of sewing the two fabrics together, I decided to just layer them. The hoop will hold things in place.

 Aren't embroidering hoops just amazing things? Kudos to whomever invented them!

 I decided to trim the excess. I probably could have just tucked it behind, but it was easier and quicker just to trim, and I don't see how else I'm going to use these napkins - no need to save!
And, done! It makes me laugh that the "Mr" napkin is stained more than the "Mrs" one!

 I followed the same steps with the "Mrs" napkin.

I still have one more hoop... so, either I'll find another goodie to hang as artwork, or I'll make another hopper. So fun :)

Monday, February 13, 2012

Table Runner!

I started this project last Wednesday, and it's been horrible hiding it from here! While I'm pretty sure Neighbor doesn't read this (she just found out I blogged a few weeks ago), I couldn't take the chance.
You see, she's a Valentine's Day Baby, but we celebrated her birthday last night. Grizz and I hosted, and it went really well! I'll post about all the fun party details later... but here's what I made my friend (aka Neighbor).

When it was my birthday, Neighbor weaseled her way into seeing my "list." The fam knows about the list... it's my super-long Christmas list that gets updated throughout the year. (It may be long, but I try to remind them, that nothing on the "list" is necessary, it's just things that I would enjoy or put to good use.) Anyways, since she saw my list, it was only right that I saw hers, right? Much to my surprise, at the bottom of her list was this...
How could I turn her down? She had seen me make this for a friend for Christmas...

But I wasn't in the mood to work with all those pointy edges, so last Wednesday, when I didn't get called in to sub, I found this inspiration. Since it was my first time doing a project like this, I decided not to quilt and piece at the same time like she did. I will probably try it next time though! I was really happy how quickly it came together.

First step: decide how long and wide you want it. It is completely adaptable to whatever you need. I knew Neighbor was at a PT appointment, so I scampered over with our spare key and measured her table :) She had said she would like one that hangs over the table some, so I added to the length. I ended up cutting the strips 13" long and I cut enough strips to make it 50" long.

 I grabbed my cutting tools...

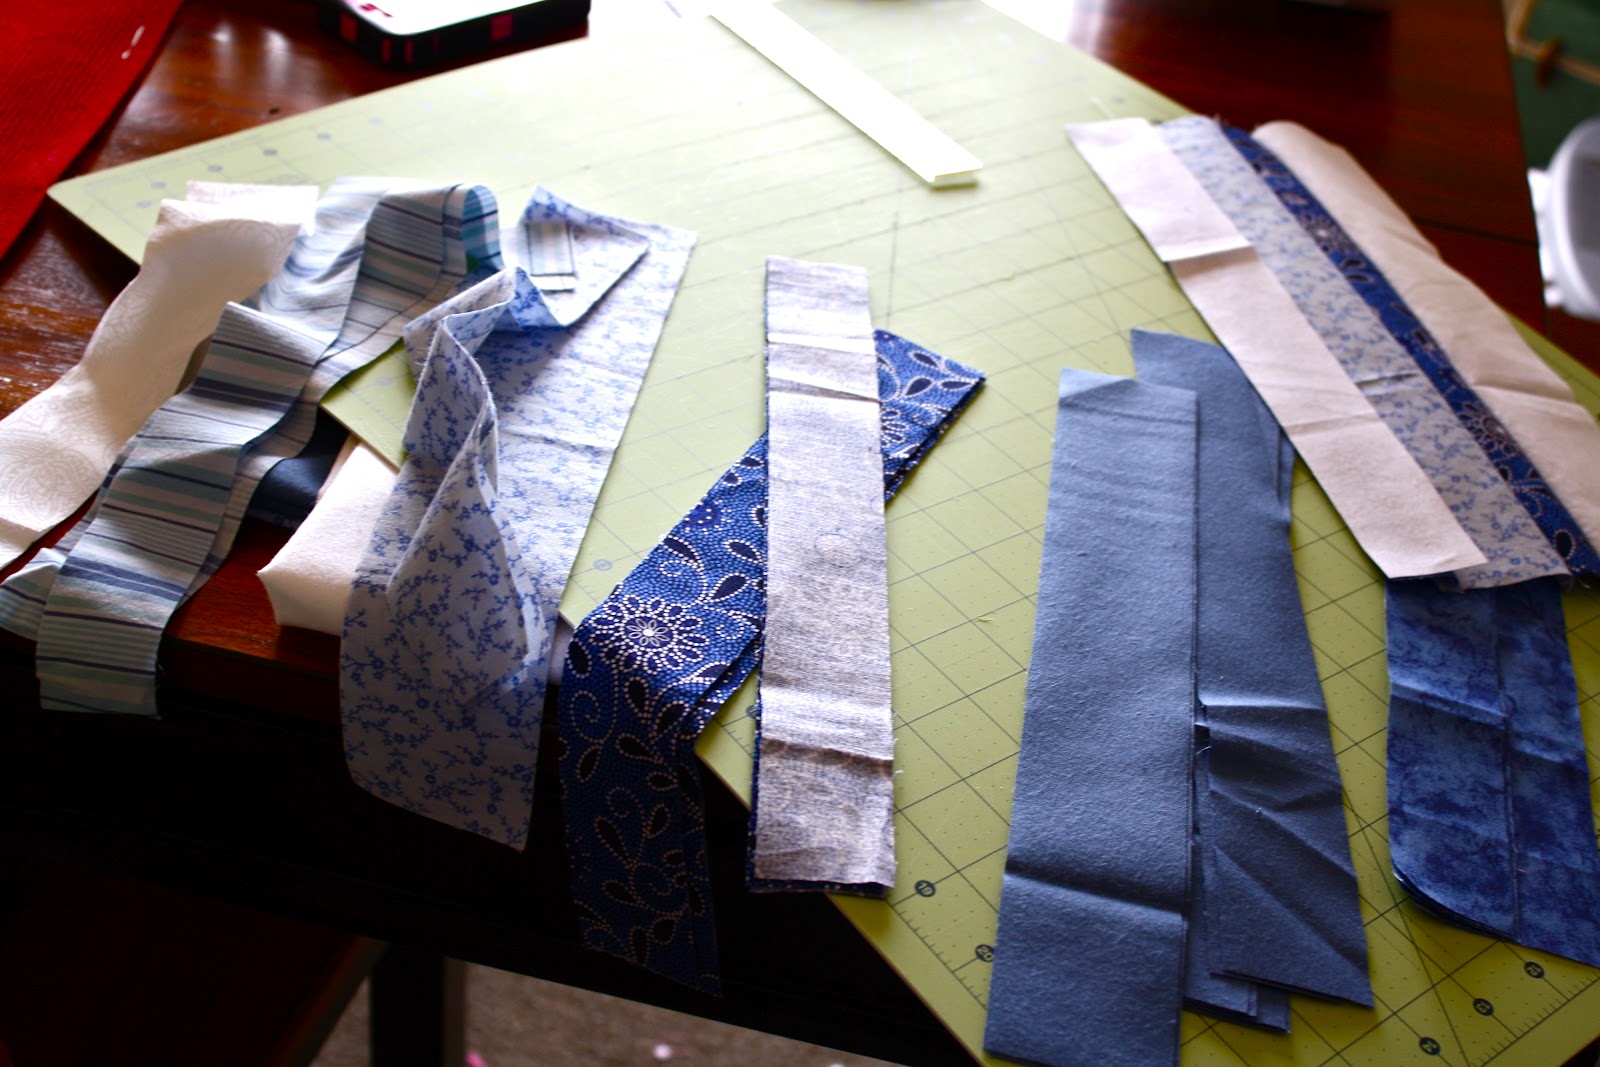
And cut the strips 13" long and various widths - my smallest strips were an inch wide while my biggest strips were 3". I had all of these fabrics on hand (my stash is growing, yay!), and I wanted to do blue because she has lots of blue glassware and pottery that will go great with this!

I lade them out, trying to alternate lights/darks and widths.


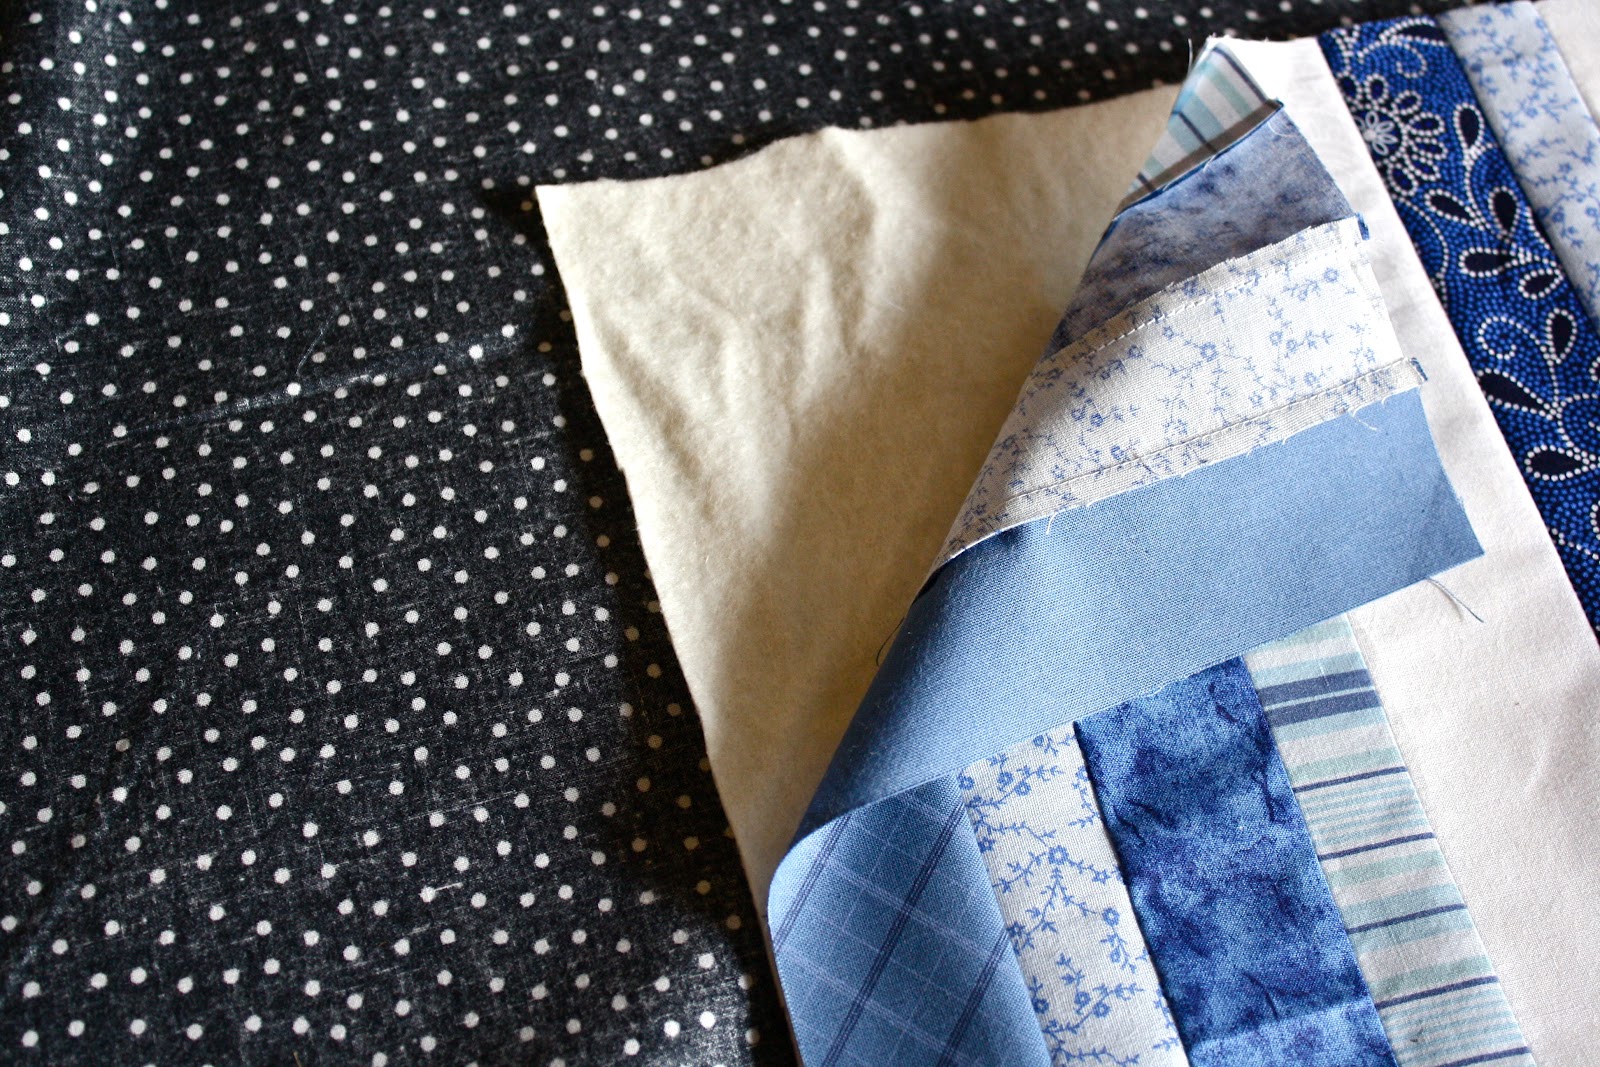
Trimming the top was one of the more difficult tasks - you always worry that you're not going to cut it straight - especially when its 50" long! But it turned out great! I found a black and white dotted fabric (yay, fabric stash!) that would be great if she ever needed a quick change in decor - this is a reversible table runner! I did have to piece the back together, since the remnant I had wasn't long enough, but it barely shows.

 Here it is, all laid out, waiting to be quilted...

I saw a picture of someone quilting and her quilt was safety-pinned. I'm positive this is not a new advancement in quilting, but I had never seen it before. Yay for safety pins!! They were perfect for keeping the quilt layers together during the quilting process.

So... I guess my machine came with a walking foot. I've never even seen one used before in person, but I've read up on them a bit. Since it came with the sewing machine, I'm sure it's a low-end walking foot, but hey, it works for me! I only quilted on the seams, so it wasn't that difficult, but I'm already in love with this walking foot - the layers stayed put and didn't slip! 

Here's a Iphone pic that I sent to Mom. (She gets all the updates via picture texts... I thoroughly appreciate her enthusiasum for my crafty adventures!) As you can see the binding is already put on. The walking foot was great for that too! I used the same white fabric for the binding as the white strips on the front. It works great with the top and with the dotty backing. This picture shows how I ended my Wednesday - thus I started in the afternoon and took breaks for supper, choir practice and a movie with Neighbor, so again, I am amazed by how quickly and easily this came together.

Here's the instagram you saw yesterday - on Thursday, I knew ahead of time that I'd be subbing for a math classroom, where 4 out of the 5 classes would have work-time and that I'd have 2 prep periods. Um... can you say sewing at school?! Ha, yup, I split my time between crocheting and hand-sewing the back of the binding (note: I updated my memory on sewing a quilt binding here...). Highlight of my day? Sewing this, while a student knitted (she had finished her assignment early). Loved it.


Another Iphone pic - update to the Mom, telling her that I was done! After sewing a bit during my prep period and study hall on Friday, I finished it Friday night before another movie with Neighbor. I was so happy to get it done in time! 


PS: during the early planning stages, I had thought to do strips in the back in Christmas fabric, so then it would definitely be reversible. I changed my mind though. Perhaps I'll try it next time... this fabric is just waiting for me to cut it up :)