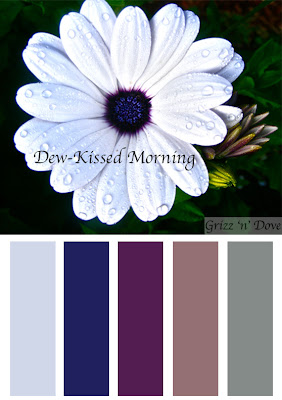
Let me start with this... I am not a Photoshop wizard. I took one class in college on photography and we dabbled in Photoshop. Last year, I was able to play a bit more in Photoshop on the Macbook provided by the school I taught at. This past summer, Grizz and I bought our own Mac, and we splurged by buying Photoshop, too.
I love pictures - I love taking them, I love editing them and I love adding words and lyrics to them. And if I've learned anything by my Photoshop dabbling, it's that you need to do some trial and error to get what you want. Just keep pushing buttons to get the affect you want, don't be afraid of the "Undo" button, and learn as you go.
With all that said (thanks for sticking with me), I am going to try to show/tell/blab about how I made these
Color Cards :) Here we go!
*Note: you can click on the photos to make them bigger if they are hard to see!
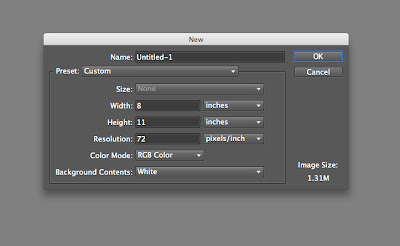 |
| File > New > Blank File |
Start with a new file
[File > New > Blank File] I start with an
8" x 11" white background at 72 pixels/inch (this should be around 600 x 800 pixels which is what I like my blog pictures to be at).
 |
| These tools will be used a lot in this post. |
Then, I search through my "artistic" photos and
drag one into Photoshop - it should come up as its own file (if you are unfamiliar with dragging photos into Photoshop, you can also open a new file through Photoshop.
[File > Open]) Once your photo is open, using the Rectangular Marquee tool, click and drag around the area that you want to use for your Color Card. Copy this.
[Edit > Copy]
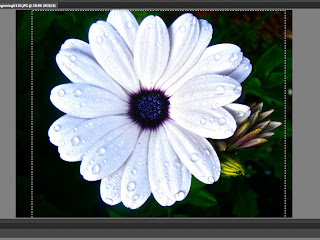 |
| Rectangular Marquee to copy from the original picture |
Head back to your "new file" and paste
[Edit > Paste]. You may need to
drag the corners to make it smaller
so it fits on your background. No worries :) Also, if you chose a horizontal picture, you will have to rotate your background before pasting the picture.
[Edit > Rotate]
 |
| The grid! |
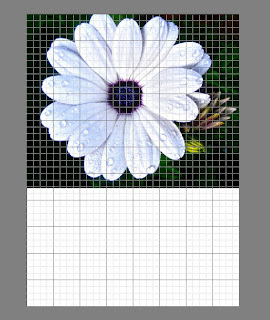
About this time, I like to put the grid up
[View > Grid]. This will help line everything up nicely and makes you sure that everything is centered.
Ok. Let's get some colors on there!
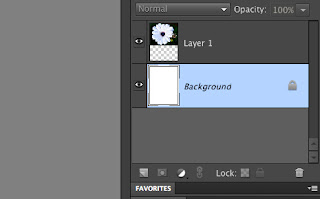 |
This is on the right-hand side of your screen.
It shows what layer you want to use/edit. |
Make sure your background layer is highlighted. Using the
marquee tool again,
click and drag a rectangular shape below or beside your picture (depending on if you have a horizontal or vertical color card). Try to eye the size of it so you can fit 5 of these rectangles in the blank space of your color card. (You can always adjust them later, or crop your background layer if things aren't lining up - use that grid!).
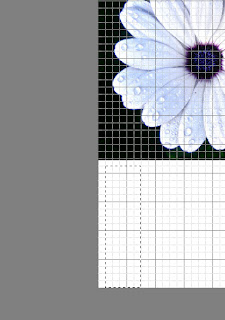 |
| Rectangular Marquee Tool |
With the rectangle still showing - go up and
[Edit > Copy], [Edit > Paste]. You just made a new layer for one color! Go ahead and "
Paint" it whatever color for right now so it doesn't blend into the background.
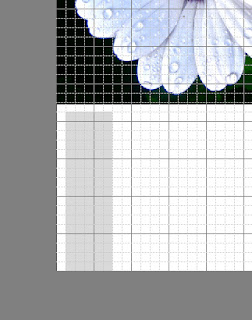 |
| After painting the copy/pasted rectangle |
Rectangular Marquee around your new colorful rectangle and
Copy/
paste this again... paste it 4 times, so there are 5 rectangles. Slide them around and try to center them on your color card. Sometimes, when starting with a new file for these, I end up cropping the background to help the rectangles fit just right.
[Image > Crop]. Once you have made one of these cards, however, you never have to mess with this part again - you can just change the picture and colors and then save as a new file!
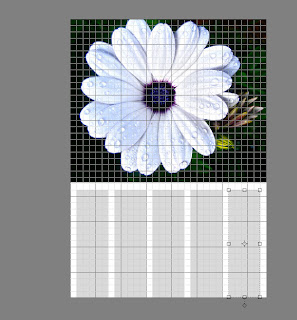 |
| 5 rectangles, all centered! |
Now for the fun part!!!
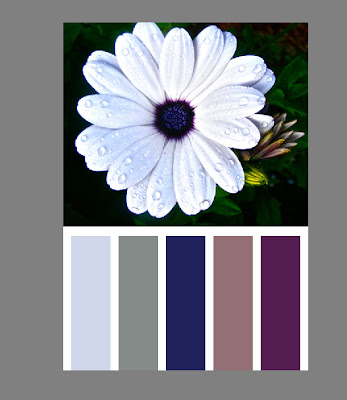 |
| After painting the rectangles |
Using the
eye-drop tool, pick out a color from your picture that you want highlighted on your color card.
Click your picture with the tool and then
paint one of your rectangles, always making sure that the rectangle you want to paint is highlighted. You can rearrange these later if you want the colors in a different order.
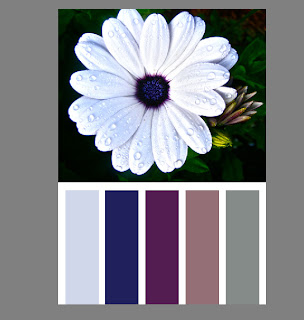 |
After rearranging the rectangles
|
|
You can be done here if you'd like... but I like to
add a title with a text box and I put a little label/copyright on as well. If you have questions about how to do either of those, feel free to comment or email me!
|
| Final Product :) |
I same my color cards twice - I first save it as a Photoshop file (.psd is the extension). When it is a .psd you can still edit it in Photoshop if you realize you want to change the colors or perhaps you spelled a word wrong... I save it again as a JPEG (.jpg). This is what I upload to the blog. Once you save it as a .jpg you can no longer edit it in Photoshop!
Like I said earlier, when learning a new software (or trying something new on an old software), you cannot be afraid to mess up... the little "Undo" button is there for a reason! It's like the seam-ripper to a quilter :)
Again, if you are unclear about a step, or you get stuck while trying this yourself, feel free to contact me! Good luck and have fun!


 Let me start with this... I am not a Photoshop wizard. I took one class in college on photography and we dabbled in Photoshop. Last year, I was able to play a bit more in Photoshop on the Macbook provided by the school I taught at. This past summer, Grizz and I bought our own Mac, and we splurged by buying Photoshop, too.


