Last weekend, we were lucky enough to take a trip to SoCal to visit my brother's family. Since they have a 3 year old and a 1 year old, they pretty much had all the baby gear we needed - we didn't have to check any bags, carseats or strollers while flying! Anyways, while using their old carseat, we noticed a stretchy, buttony contraption on each side. After asking Sister-In-Law about them, she explained that they are used to hold the straps... what a great idea!! We had just been trying to place the straps to the side while placing Peanut in the seat, but we would still have to dig for the straps underneath her - this sometimes lead to a disgruntled Peanut. With these contraptions, the straps are held out to the side, making strapping Peanut it much more enjoyable!
See the difference? The contraption holds the strap to the side, instead of letting the strap just sit there in the way of a baby.
So, without further ado, here's a small tutorial so you can make them for yourself or as a great baby shower gift! Please realize that different car seats might need different lengths of cording and different lengths between knots... if you have a car seat, make sure you guess and check a little to make sure it fits!
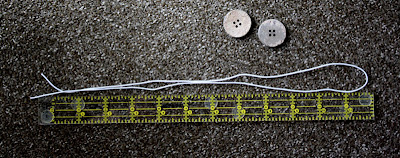
You will need an elastic cording - I used the "beading cord elastic," but I'm sure the "round cord elastic" would work just as well. I was in a rush in Walmart when I picked these up, so I grabbed both just in case :)
You will also need two buttons. I used to have my collection in a large canning jar, but I sent that home in a craft tub... we're slowly trying to relocate our stuff 14 hours from here in preparation of moving home! Someday, I'll be able to put my collection back in the jar; until then, a baggie will just have to work.
Cut a 24" length of the elastic cording and fold it in half.
Place the folded end through through one of the holes in the button - from the back to the front.
Then, place it back through another hole - from the front to the back - and pull a good length though (this is when guess and check works really well!).
Knot the end! (Again, guess and check!)
This is when I thought I was done. Then, I had an idea. Buttons and babies don't always go over well - choking hazards and all. So, I created another step...
Place a knot between the button and the folded end. Then, if Baby somehow gets the contraption off the car seat handle, at least there's a knot on both ends and the button can't fall off... it may not be a perfect fix, but it's enough for me. I really don't see it being a problem, but it's an easy step toward being a tad bit more safe :)
Don't forget to follow the same steps to make the second one! You need two of these holders!
... then, loop the knotted end around the strap and hook it on the button.
Place the second one around the other side of the car seat handle, and you are ready to place Baby down without having to dig under him/her for the straps. Yay!
Linking up with Sew Much Ado at We Did It! Wednesday...


Thank you for this awesome idea!! I am going to go tonight and buy what I need to do this.
ReplyDeleteThis comment has been removed by the author.
ReplyDelete