See the previous post on why I'm making baby things... again, this one is for an old co-worker's little boy. So, she'll get this and two of these in the mail soon.
The idea for this project came from a modge-podge of sources. Neighbor, Google, and this Pinterest post. I couldn't decide if I wanted to do a blanket or a toy or a letter-thing. So, I combined them all together.
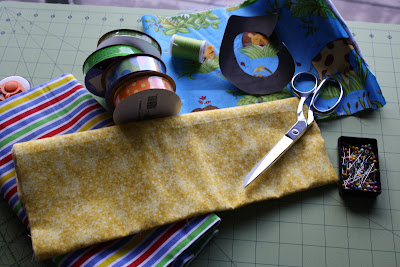
The ribbon was originally chosen to match the striped cotton, but thankfully it matched the animal print as well! However, the animal print and the striped fabrics do NOT match (the blues are way off), but as you'll find out, you'll never see them together!
I printed off a letter "C" from a word-document. Then I decided it was too small and I made it bigger by adding a half-inch all the way around it. A fun part was trying to place the letter exactly where it could show off several of the animal faces :)
I have never appliqued anything by myself before (however, I watched my mom do it tons of times while making baby bags, AND I put a cat's head on a poodle skirt for a 4-H project once in like the 5th grade - with Mom's help of course). Anyways, since I hadn't planned exactly what I was making before I finally sat down to do it, I didn't have the interfacing-stuff I needed to make the letter stick to the flannel while sewing around it. Grizz wanted to warm up the vehicle anyways so he could change the oil... so, what better place to go than to JoAnn's?! Two quick calls to Mom was all I needed to make sure I got the right stuff (Stitch-Witchery). You iron it between the two fabrics so letter stays in place perfectly while you mini-zig-zag around it. It didn't turn out too bad for my first time!
I placed the ribbons about 3 inches apart and with about 1 1/2 inches sticking out. Trying to place them exactly where I wanted was probably the most tedious part of this project.
I used a natural-cotton batting for the first time. I could leave up to 10" between quilting lines. I used my triple-stitch-zig-zag to make an easy grid in the open yellow-places.
As you can see, I quilted around the letter as well - that kind of spiced up the back!
The finished project is about 18" x 12". It's kind of in between a blanket and a toy, but I can just picture a little baby cuddling with it and playing with the ribbons! I hope he (and his momma) like it!
It took me a few hours on a Saturday morning and a few hours on a Sunday afternoon to complete it. I was so excited to have a free Saturday morning to start my project, that I even got "upset" with Grizz for trying to make me eat breakfast. What can I say, when I start getting crafty, it's hard to get me to stop!


An awesome taggie!!! Love the fact that you've quilted it and the applique just finishes it off perfectly! I'm sure it will be well used...
ReplyDeleteHi Heidi, I featured your taggie today...
ReplyDeletehttp://threadingmyway.blogspot.com/2012/03/threading-your-way-features_31.html